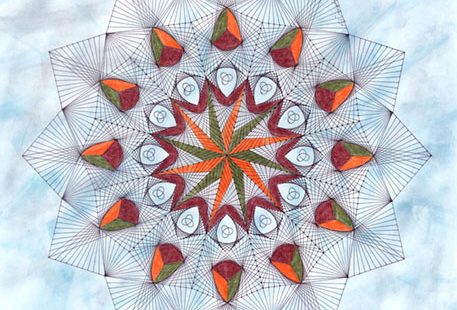
Strike 2
Strike 2 is the 2nd of 12 pieces in my Clock Face Series
Each piece in this series will begin it’s life as a circle, with a radius of 9″, divided into 12 equal segments. A protractor is used to measure 30 degrees for each segment. From the initial baseline shown at left, I then think about how many sections I will divide each ‘radial arm’ into – Hmm… I just made that name up, so you can call them whatever you would like to, as long as it makes sense to you 🙂 In ‘Strike 1’ and ‘Strike 2’, each ‘radial arm’ was divided into 3 sections. I don’t usually draw the ‘radial arm’ lines in as in the example shown as it may not necessarily ‘fit’ the completed piece. I have simply drawn them in here to illustrate the point.
Outline of My Process
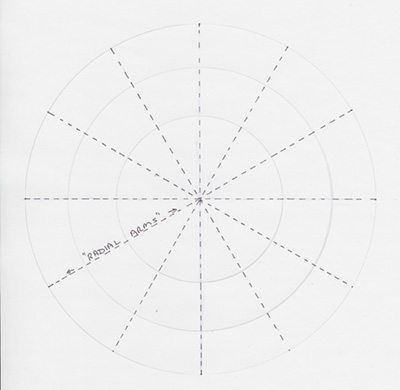
What I would usually do would be simply to make a dot at the edge of the circle for each segment and then add pencil lines to the centre as guidelines. Each ‘radial arm’ is then divided into sections, as indicated by the pencil line. These sections can be the same or different sizes. From here, I would decide on how I would create the individual segments by joining the intersecting points.
There is quite an involved, scientific process involved in working this out. A detailed step-out would go something like this….
- ‘what if I joined these points (in pencil) off course – would that work?
- Hmm… No 🙁 Rub that out… What if I tried ‘ABC’
- Ah, Yes, I like that…
- Now, if I added ‘XYZ’, how would that look?…..
I’m sure you get the general idea
Next I would look at how I would create the parabolic curves within each segment. For this, I would use the same involved, scientific process as detailed above 🙂
Essentially, the steps involved are-:
- Divided the circle into equal segments.
- Divide the ‘radial arms’ into sections.
- Create individual segments by joining the intersecting points.
- Create parabolic curves within the individual segments.
These pieces work well printed as ‘Clocks’.
At ‘RedBubble’, you can select have your favourite piece printed as a clock. Change the frame colour and the colour of the hands to suit the piece and your taste 🙂
Are You Interested in a Workshop?
It is beyond the scope of this blog post to go into great detail about how I create one of these pieces. However, I do hope that I have included sufficient information to at least point you in the right direction.
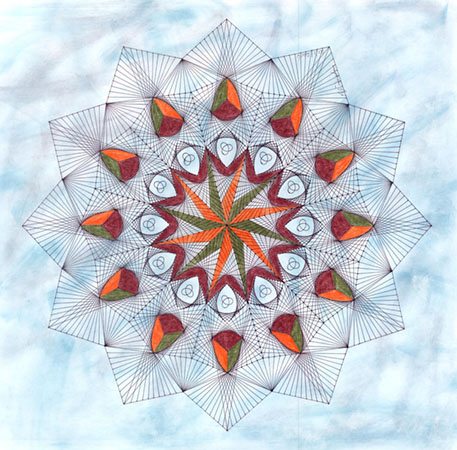
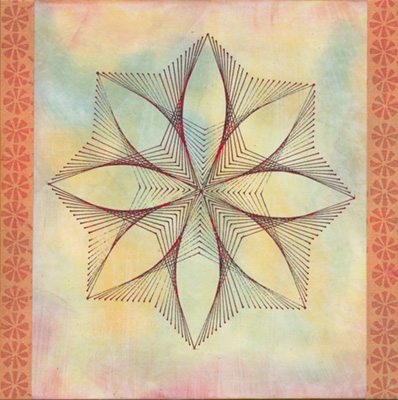
I did the ‘Sample Tile’, divided into 8 segments, shown at left about 6-8 weeks ago. I liked the concept and have kept it to use as ‘inspiration for something else down the track’ :). ‘Strike 2’ started out based on the same concept, though with the circle divided into 12 segments. Interestingly, I think the only resemblance between the inspiration ‘Sample Tile’ and the finished ‘Strike 2’ is that they both began as a circle 🙂
I would love to write a workshop on creating ‘Tangled Line Art’. Please contact me via the contact form below to register your interest. I would love to hear your thoughts on this.