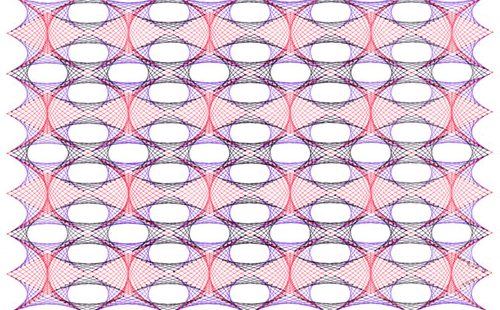
Divided Square
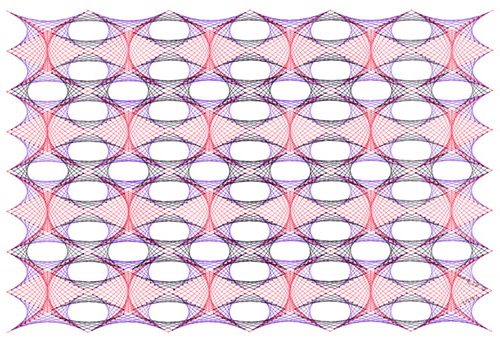
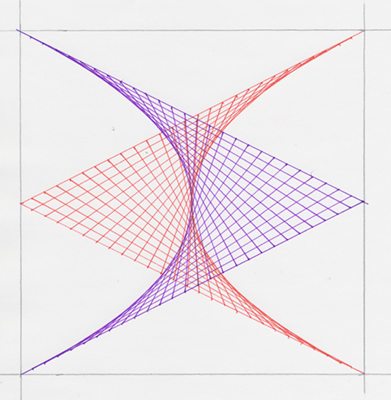
‘Divided Square’ began as a square divided into two triangles as detailed below. Ironically, though it began as a square, once completed, I could see other geometric squares within the piece – but I couldn’t see a square – so I had to call it ‘Divided Square’ 🙂
On my lunch break on Friday, I started thinking about what would happen if I drew a square and marked the half way point on opposing sides of the square. From there, I could visualise joining those points to the opposing corners to create two intersecting triangles. From experience, I knew that if I drew parabolic curves within each of those two triangles that they would overlap. However, I couldn’t visualise what the end result would be if I created further parabolic curves in the spaces where the squares met?
So I had to get home to draw it 🙂 A basic outline of the process follows-:
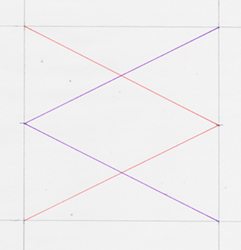 |  |  |  |
- Dividing of the square
- The initial two parabolic curves
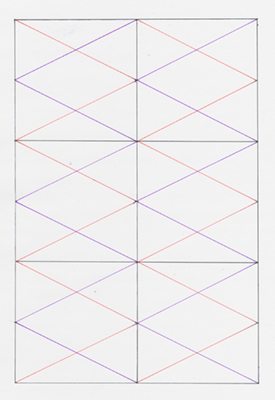
- A grid of 2 x 3 squares with the intersecting triangles drawn in (‘Divided Square’ is based on a 6×4 grid of squares)
- The same outline as at step 3 – minus the edges of the squares
- Draw in all initial parabolic curves as shown at step 2
- Add additional parabolic curves, in your choice of colours, at the intersecting points.
- The lines that are the actual edges of the squares should be drawn in with pencil. They do not form part of the completed piece and are only show to help clarify the process. Rub these lines out as you feel comfortable doing so.
……. and you have your version of ‘Divided Square’ 🙂
Divided Square